|
| |
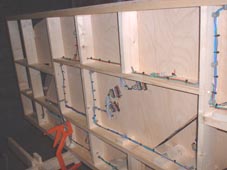
LAYOUT ELECTRIC'S AND ELECTRONICS
For many enthusiasts layout electric's are the 'stumbling block' between
completing a layout that performs to the required standard; and a layout that
works, but not necessarily as required. Electrics may also prove the barrier that
prevents a layout from being completed or even started. The most requested service offered by
Professional Layout Services is layout electrics which encompasses Control
Panels covered in a separate section.

As detailed on the PLS welcome page,
we do not insist on constructing a full layout for the client; we are happy to
estimate for any single job, for example layout electric's. Layout electric's
can be achieved using three basic methods:
- Conventional or 'analogue' layout wiring.
- Digital (DCC) layout wiring. Sometimes referred to
as Multi-train Control.
- We also offer a combined service with DCC track control and analogue
turnout motor control.
This section deals with conventional or 'analogue' layout wiring. Digital
(DCC) layout wiring is explained in detail in our DCC
Digital Control section.
CONVENTIONAL LAYOUT WIRING (ANALOGUE)
Analogue layout wiring involves the traditional methods of cable and switches to
operate the layout. The three principal areas of layout wiring are detailed
below:
- Track section wiring - getting the power to the locomotives via the track.
- Turnout motor wiring - electric turnout motor control (points) including
frog polarity.
- Signal wiring.
It is important when wiring a layout as a beginner to focus on each of the three
areas individually to avoid an electrical disaster. However as one becomes much
more experienced, all three areas converge to achieve prototypical running or 'interlocking'.

1. Track Section Wiring
The sight of a locomotive moving slowly across plain track and turnouts is for
many what a model railway is all about. It is to do no more than replicate the
everyday operation of the prototype. However, how often is this achieved both on
the home layout, and on layouts seen at exhibitions. Many regard this
performance as unreachable by the average modeller. Five factors effect running
performance on a layout - Track type and quality of fixing,
controller, locomotive mechanism, cleanliness and wiring.
 | Track type and quality of fixing -
Track is dealt with in much more detail in our Track
Laying section. However the basic requirements for good performance are
careful fixing of your track, ensuring it is flat, level and correctly joined.
Do not force the track, if it looks good to the human eye, and smooth to the
touch, performance should be good - if in doubt look at the track in a mirror
- it will make any errors more apparent. Any irregularities in the track will soon
emerge once running commences. It is better to spend more time initially
carefully fixing the track, than risking deformation or permanent damage to
the track by having to lift and relay. Electrofrog turnouts are essential where size
permits, and most experienced modellers accept nickel-silver or
phosphor-bronze to be the most reliable materials. Where understanding allows,
convert electrofrog turnouts to livefrog removing the need for the switch rail
to retain pressure on the stock rail to achieve a circuit. This requires a
switch to change frog polarity either on the turnout motor or as a separate
SPDT switch. |
| Controller type -
Generally the modern electronic controllers perform better at low speeds than
the older 'rheostat' controllers. It is not fair to expect miracles from a
twenty year old controller. Would you expect a television from 1970 to perform
like a television purchased in 2000? The controller should be matched to the
size of the layout and to the stock running on the layout. If the layout is
under powered, poor performance and damage to the transformer may occur.
Contact us for advice. |
| Locomotive mechanism - motor, gears, collectors
(pick-ups) & wheels.
As with controllers, it is not fair to expect a locomotive purchased many
years ago to perform as well as modern stock. In the last few years we have
seen major improvements in the quality of mechanisms. Better quality motors,
gears and wheels are now being used as the major manufacturers realise the
demands for quality from the enthusiast. Locomotives constructed from kits
usually have the benefit of the builders choice of wheels, gears and motor.
With a wide variety of materials available careful consideration should be
given to these essential components. |
| Cleanliness -
The most common cause of non-running and a large contributor to poor running
is cleanliness.
The best quality track, controllers and mechanisms will all be adversely effected by dirt. Dirt accumulates on the track, locomotive wheels and axles,
and within the locomotive mechanism, particularly on the commutator of the
motor. Regular cleaning of the track and servicing of the locomotive is
essential. Electronic track cleaners can be installed to help fight the grime.
Remember dirt will always get in those hard to reach places. On insulfrog
and electrofrog turnouts dirt will accumulate on the rear of the switch rail
blade and in the stock rail rebate. If this is not cleaned the turnout will
not conduct power correctly requiring the tie bar to be pushed over. Clean
with 1000 grade wet and dry paper folded back on itself to make it double
sided - then trap the two rails and clean. |
| Wiring -
Correct wiring allows locomotives to run around a layout at low speed. It
should not be necessary to have to run at high speeds to change between
controllers operating different sections or circuits - this is usually a
common return problem. Larger layouts should be
broken down into electrical sections or blocks to achieve better running.
The type of track wiring used on a layout depends on who is going to use
the layout, the size of the layout and the locomotive movements required on
the layout. On small layouts particularly those for children or the beginner,
keep the wiring simple so it is easy the understand. If Setrack is being used
with insulfrog turnouts, use the turnouts to feed the track rather than
switches. On larger layouts break the layout into operational blocks/sections
usually determined by the running requirements. Isolate the blocks using
insulated/plastic rail joiners (or a simple break in the track) and feed each
block from a switch allowing the block to be switched off. Use a common return
system where two controllers are in use (check your controller is suitable)
allowing locomotives to cross between controllers without the need for speed.
The introduction of two way switches with a centre off position (SPDTc/o or
DPDTc/o) produces the greatest operational freedom on the layout, allowing
each block to be controlled by either controller or to be switched off. Other
useful additions to track wiring are 'push to make' switches (PTM) located to
control the ends of sidings. A single cut in one rail approximately 300mm from
the end with a PTM switch across the break, automatically stops a locomotive
as it crosses the break preventing damage to the buffers. The break also
allows a locomotive to be stored at the end whilst moving another locomotive
on the same track. The stored locomotive can be moved simply by pressing the
PTM switch. Additional track wiring can include train detection circuits and
automatic shuttles and station stops. Contact PLS for more details of our
track wiring service. |
2. Turnout motor wiring
Why wear out the carpet (or the floor) walking up and down the layout changing
turnouts? Install turnout motors. Most turnout motors function using two
solenoids which move a bolt connected to the turnout motor thus changing the
direction of the turnout. The power supply to the solenoid has to be
'non-latched' or momentary preventing damage to the solenoid coils. The use of
a schematic track diagram with studs touched by a probe to complete the
circuit is common. The studs however can be replaced by push to make switches
or biased (momentary) toggle switches. For greater efficiency fit a device
known as a CDU or Capacitor Discharge Unit. On most layouts only one CDU is
required regardless of the number of turnout motors on the layout. The CDU
increases the power available to the switching method, virtually eliminating
'sticking' solenoids, prevents damage to coils and allows in most cases more
than one turnout motor to be operated from one switch i.e. facing and trailing
crossovers. In more advanced use the solenoid motor and CDU can be combined to
produce diode matrix, allowing complex routes to be set from one switch. A
simple diode matrix is useful for the control of slips and three way turnouts.
Slow action turnout motors are sometimes used by the more experienced
modeller. These motors usually require a 12v DC power supply and a latching
switch. Power is supplied to the motor from the switch until it is cut off by
an internal microswitch controlled by diodes. The motor direction is reversed
by changing the operating switch direction which reverses the polarity to the
motor. Contact PLS for more details of our turnout motor wiring service.
 |
 |
3. Signal wiring
Signals on model railway layouts are either the older semaphore signals, or
the more modern colour light signals. Electrically operated semaphore signals
can be expensive as they require an accurate mechanical mechanism (often
electric motor or servo controlled) to actuate the fragile signal arm. Colour light
signals are much easier to wire as they need no mechanical control. If a
simple green or red light option is available, a simple two way switch will
suffice (SPDT). Signals however rarely operate alone. When one signal shows
the all clear, another somewhere on the layout may show caution or stop as a
consequence. This is where interlocking becomes useful. Although not strictly
prototypically correct, the control of signals particularly colour light can
be assisted using accessory switches attached to turnout motors, often via a
relay/s. This allows all the related signal options to be controlled by the
turnout positions on the layout.
PLEASE NOTE:
Model railways always use low voltages usually below
25V. Never connect direct to the mains or any other unauthorised power supply!
Always follow the manufacturers instructions and if in doubt always consult a
qualified electrician.
|